Invite new users
This section will describe the main functionalities related to adding new users from the Team section to the platforms (SME and CONSUMER), and the differences between them if necessary.
Onboard a new user onto the platform
Every Director in SME or Account Owner in CONSUMER can invite a new user to the platform by selecting 'New user', located at the top right button.
The user will then need to follow the next steps:
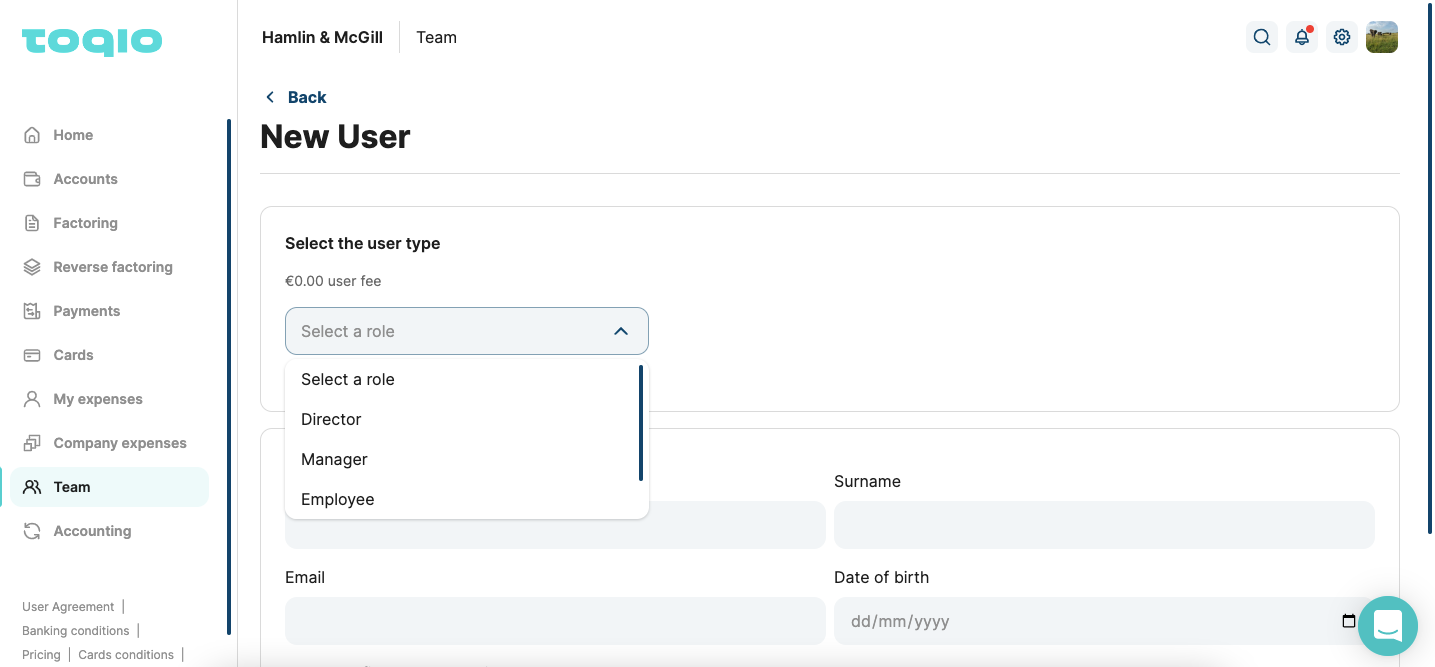
- Select user role:
- Dropdown to select a role. When selecting it, a copy text will be shown with a brief explanation of what the role is:
- ADMINISTRATOR: by creating an ADMINISTRATOR you will grant this user access to all the functionalities, including expense management, business current account, ordering payments, managing company cards, and managing the team.
- DIRECTOR: by creating a DIRECTOR you will grant this user access to all the functionalities, including expense management, business current account, ordering payments, managing company cards, and managing the team. This user is still an employee of the company, so in the reports, they will be linked to payroll, etc.
- EMPLOYEE: by creating an EMPLOYEE you will grant this user access to a reduced version of the functionalities. An employee can create expenses and be informed about their expense management status. Also, they can edit their cards, if any, and their personal details. This user won't have access to the business's current account, payments, team, or company cards.
- ACCOUNTANT: this user is an external provider who will have reading access to your company data. Also, they will be able to manage some features as mapping categories in your third parties integrations.
- Dropdown to select a role. When selecting it, a copy text will be shown with a brief explanation of what the role is:
- Add personal details:
After selecting the role for the user you created, details must be introduced including all the following fields:
- Name (mandatory)
- Surname (mandatory)
- Email (mandatory)
- Phone number (mandatory)
Once the details are filled in, select the 'Save' button to continue the process.
- Confirmation page:
A new modal will open to confirm the user information provided in the previous step.
- Summary of all the data provided
- Warning message: By confirming,[Name Surname] will receive an email requesting them to set up a password. You can see their details in the team section.
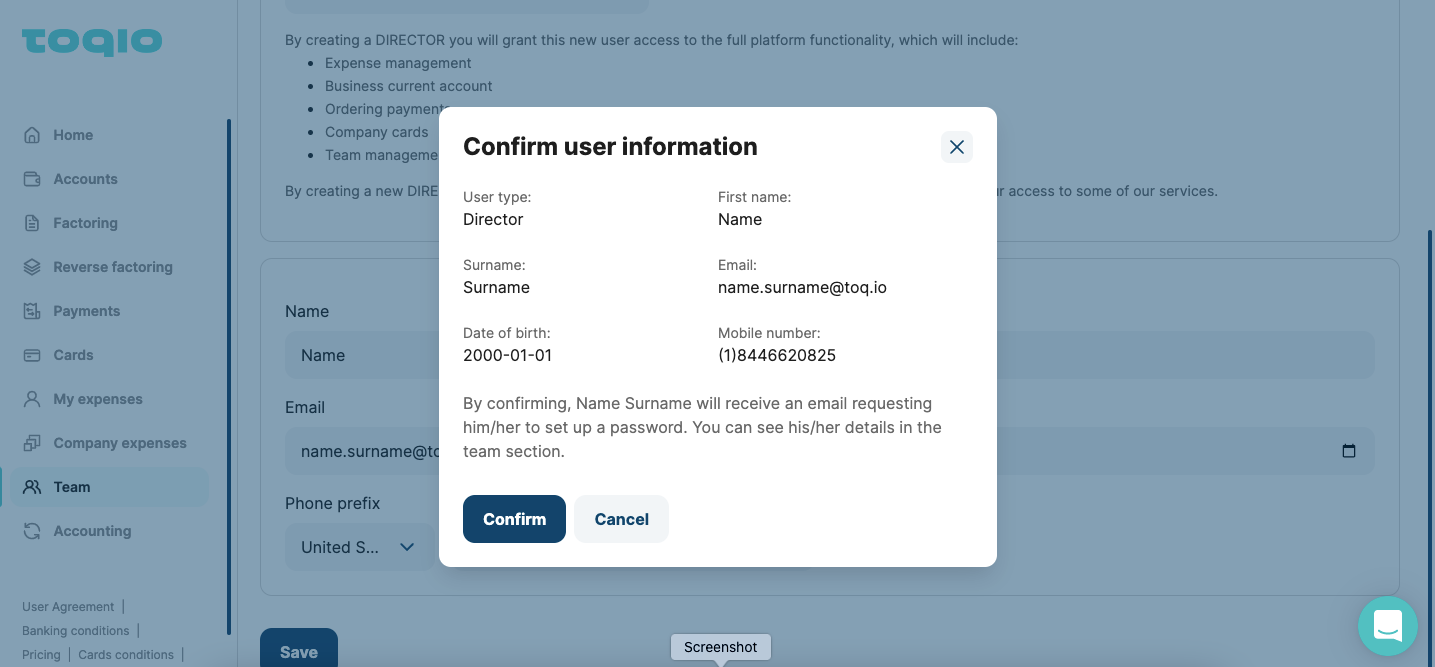
- When the user selects 'Confirm', a new modal will be shown asking for the OTP received on the Director or Account Owners mobile phone saved in DDBB.
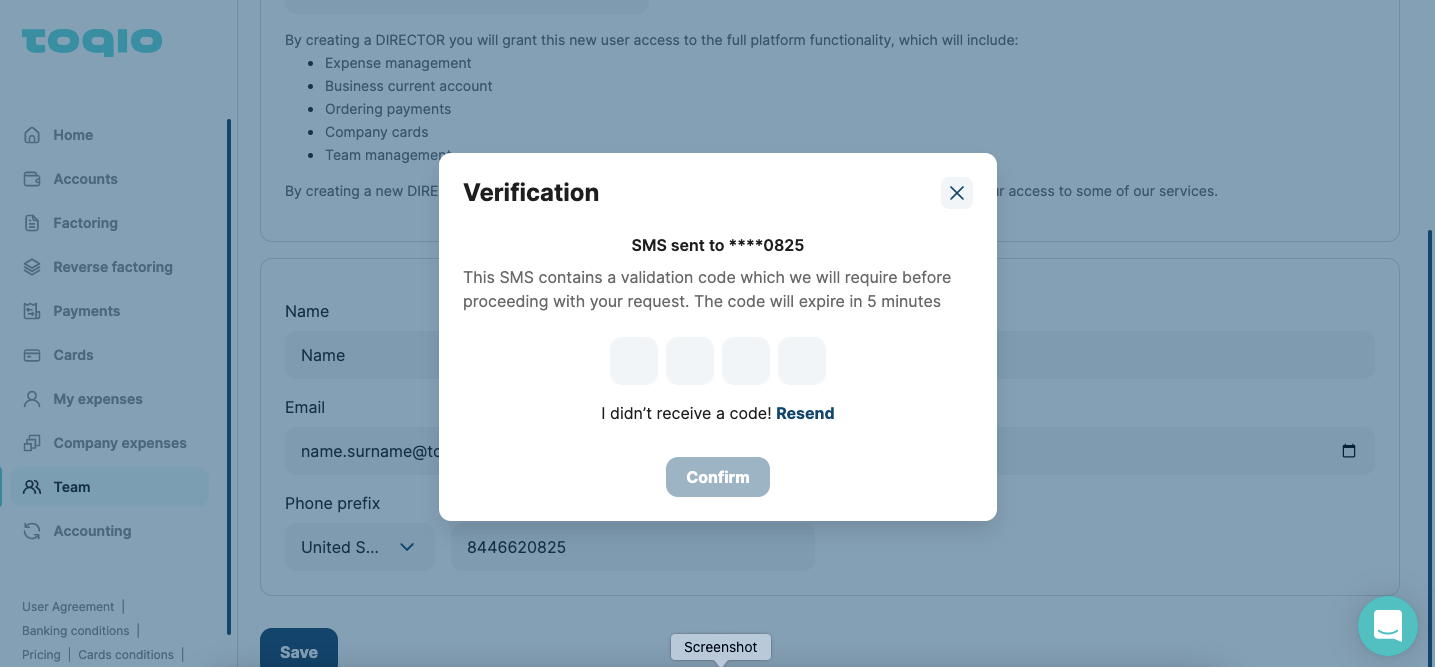
If the OTP introduced is correct, the invited user will receive an invitation email with a link (and a token with an expiration time of 48 hours, for security reasons) to set up credentials and join the platform. To see further details about user onboarding email and credentials, go to Ensuring security.
Also, the new user will land in the Team list under the invited tab. Once the user is fully logged in, they will be shown as an enabled user in the Team section.
Notifications when new users have joined the app
When an invited user joins the application, Director or Account Owners will be notified by:
- Push notifications: TO BE CONFIRMED
Directors or Account Owners will receive a push notification on their mobile devices through Toqio's customer app. This notification will contain the following information:
- Title: [Name Surname] has joined [Company Name]
- Body: Click to see user details
Once the notification is opened, the user will be redirected to a detailed page of the operation.
- Notification centre:
Directors or Account owners will receive a new notification in the Notification centre by selecting the bell icon at the top right.

This notification will contain the following information:
- Title: [Name Surname] has joined [Company Name]
- Body: Click to see user details
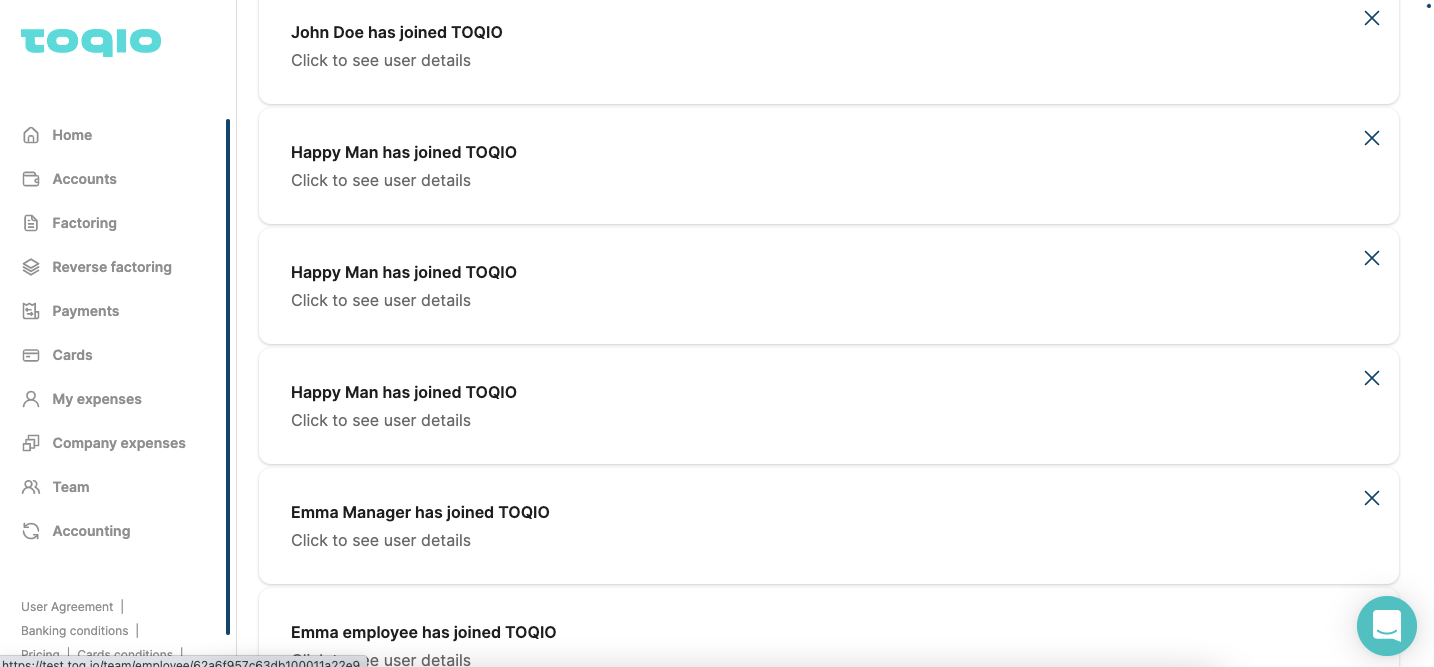
Once the notification is open, the user will be redirected to a detailed page of the operation.
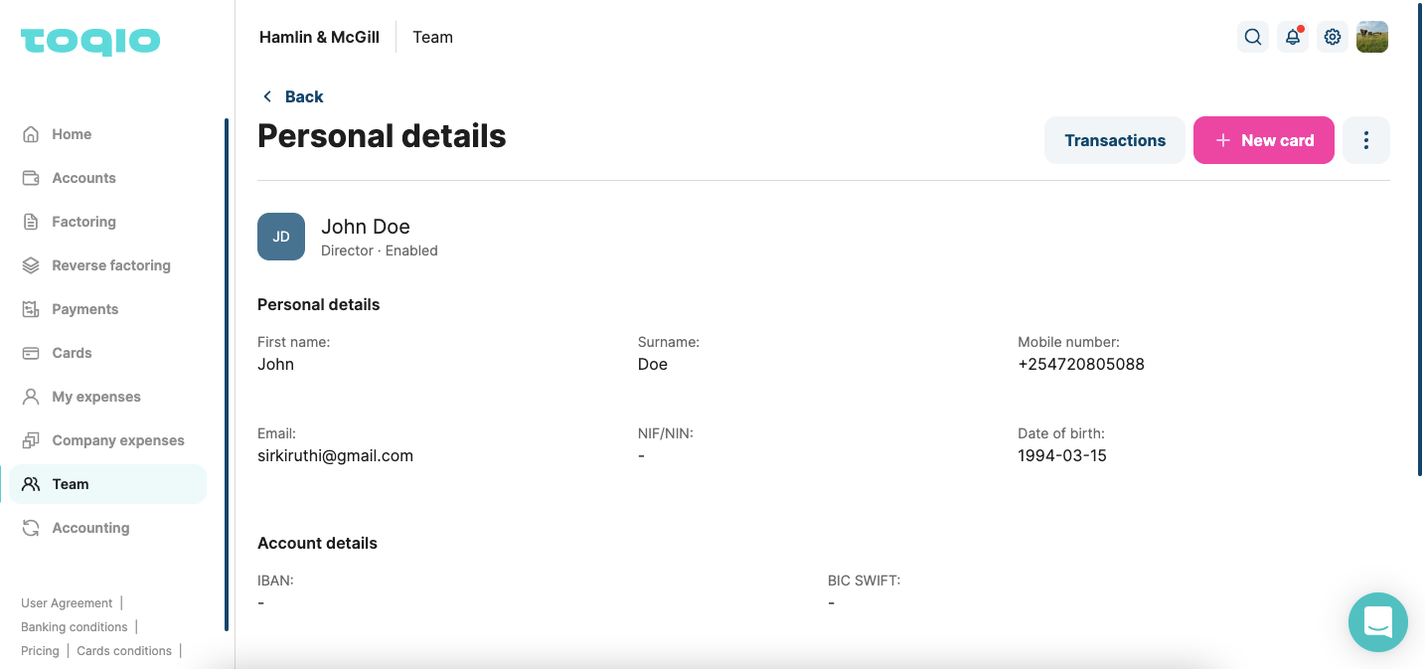
After reviewing the detailed information, the notification will be removed from the notification centre.
How to resend invitation links to new users
If a newly invited user hasn't set up credentials yet, Directors or Account Owners can resend the email invitation from the user profile in the Team section. Users invited will be placed in the 'Invited' tab.
Directors or Account Owners will find a 'Resend' button at the top right, that will open a new modal containing the following information:
- Title: Team
- Description: You are about to resend an invitation to [Name Surname]. Would you like to proceed?
- 'Accept' and 'Cancel' buttons:
- If the user selects 'Accept' the invitation email will be sent again
- If the user selects 'Cancel' they will be back to the user details page
Possible error:
If a new user is trying to enter their account for the first time and they add the OTP code wrong 5 times, for security reasons their account will be deleted. This is how the process goes:
- The new user introduces the OTP wrong 3 times will result in an email sent with a warning that they have 2 more attempts.
- If the OTP is introduced wrong again two more times, the system will automatically delete the user account and notify both the user and the administrator.
If this happens, you can create the user again.
Updated about 1 year ago
